In my introduction to “My big fat basement project” I mentioned the first part of the project, which was painting the basement floor. This was done mainly because a) the existing floor was in perfectly fine shape, it was just… well… ugly and b) I really couldn’t afford to do anything else to resolve the issue outlined in “a”. I was quite hesitant about doing this because the space is nearly 400 square feet and if I messed it up badly, or if the paint wouldn’t adhere, I would be forced to replace it, and that simply wasn’t financially feasible.
It was do or die time…
I went online and did LOTS of research – DIY sites, individual homeowner blogs – read lots of advice about “how to” and looked at LOTS of before and after photos. Saw an equal amount of “you CAN’T do that” and “I’ve done this and it worked out great”. It was pretty confusing, to tell you the truth. Ultimately, though, I decided it could be done, and done well, and I could do it myself.
I chose Zinsser B.I.N. Shellac-based Primer (appropriately tinted), and Valspar Ultra Premium Latex Satin Porch Paint in the color “Safari Brown”, as I wanted a deep chocolatey-gray brown (it’s VERY dark). I also decided that it was a good time to invest in a paint sprayer. Not only would this save time (and my back!), but it would help ensure a beautiful, flawless finish, and I have lots of painting projects (including the wood portion of the front of my house), so I knew that a mid-priced sprayer would be a good investment. I decided to go with the Graco Spraystation (I KNOW, if you’re a mom like me, it sounds like “Graco Playstation” lol). It did a fantastic job and there was NO paint under my nails when I was done – LOOOOVE that!
**Side note: Getting the gallon of Zinsser primer tinted was a bit of a challenge. “Outside” primer manufacturers (ie: Zinsser, et al) don’t leave enough room in their cans to add a lot of tint (as opposed to the store brand primers, who do since they want you to use/tint their primer with their paint). In my case, because I was going from white to a color that was nearly black, it was important that the primer was tinted per Valspar’s recommendation. Not doing this would have added at least one additional coat of paint. At Lowe’s (where I bought the paint) they are not allowed to pour out any paint from the can to create the necessary space to add the tint (I begged but they wouldn’t budge. Some nonsense about regulations or getting fired… blah blah blah *eye roll*…). Finally I asked if they would just give me the additional tint necessary in a cup and I could add it myself at home, to which they obliged. So, I ended up adding a small lidded container (they gave me the tint in a foam cup – I didn’t want to spill that in the Cadi!), a large paint bucket and a paint mixer attachment for my drill to the shopping list (they did not charge me for the additional tint). When I got home, I dumped the gallon of primer along with the tint into that big paint bucket and used my shiny new mixing attachment to create primer perfection!
Let me tell you: Shellac-based primer is NO JOKE! When they say “use in a well ventilated area”, they really mean it. My basement happens to be a walk out, so there is a sliding door I was able to open, as well as opening the door that leads to the garage and opening the big garage door. I even wore a mask – and it was still crazy-stinky! If you have a traditional basement with no windows, I’m not entirely sure I would recommend this. However, having a perfect opaque coat of primer after just ONE coat was well worth breathing in all those chemical fumes lol. As much as this stuff hurt my lungs I LOVE it! And it sticks to everything without sanding (I’ve used some of the left over primer to prime the laminate cabinets and the really fancy-pantsy royal blue laminate counter top down there – seriously, *eee-gads* sooo not fabulous – but that’s an entirely separate episode…)
Following the manufacturers instructions on the sprayer I did a viscosity test and found I didn’t need to thin the primer for use in the sprayer, however, getting it OUT of the sprayer took some doing. Because the primer is shellac-based (and not water based like more commonly used Latex paint), when you get it wet, it coagulates and goes all rubbery. I was able to successfully clean it with very hot water and Dawn dish detergent, but I had to take the gun completely apart IMMEDIATELY after use and use a wire brush to clean it (we’re talkin’ taking out all of the little bits inside the tip, etc. and scrubbing them clean). But the primer was on beautifully with lightening fast speed (I had one of those “OMG! Why didn’t I get one of these sooner?!!” moments)
When it came time to paint on the Valspar Latex Porch Paint, I found that I did need to thin it for use in the sprayer. For this I used Wagner Paint Easy Latex Paint Conditioner (recommended by the *paint guy* at Lowe’s). You can thin paint by the gallon, so that’s what I did so it would make filling up the sprayer container faster while I was working.
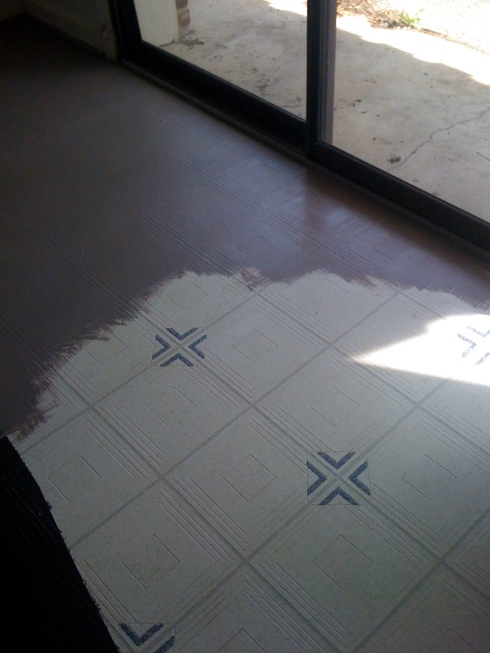
One coat of primer and two coats of porch paint later, and my entire basement looked like a big, delicious, magnificent Hershey’s candy bar! I was so happy I poured myself a drink and did a dance! I was originally concerned that the pattern in the floor would bother me, but it doesn’t. In fact, I think it adds wonderful interest to what would otherwise be a really plain slab-o-brown-floor!
I let it cure for a week before moving furniture down there. It was kind of like torture, but I’m glad I put on my “patient” crown because I just know I would have managed to scratch that floor. Incidentally one week after moving the furniture down there the sump pump failed during heavy rain. We don’t talk about that day (shivers), I’m just grateful I discovered it when I did because otherwise it could have been a lot worse – it turned out to be a failed electrical socket and my pump has no backup (Hey, I’m from L.A. we don’t have basements – or rain lol – so there is a wet weather/basement learning curve going on, mkay?). Since I had to use chemicals down there to clean in order to get the *stinkies* out, I did end up messing up bits of the floor that just weren’t ready for chemicals yet. 😦 A little touch up here and there and everything was good as gold again, though. All’s well that ends well….
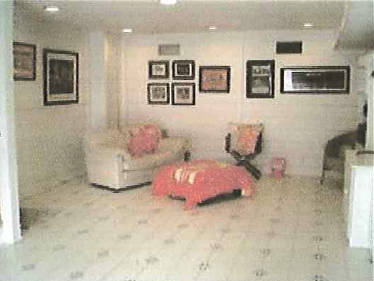
I did the previously mentioned 7/8’s of the floor before I started this blog, so now, unfortunately there is furniture and rugs down there covering a large portion of the floor space, but here are a few pics to help you get the idea:

Having the primer tinted that dark really helped speed up the process, and meant fewer coats of Latex paint. That's ONE coat of primer!

The contrast between the floor *before* and the painted floor *after*. I used one coat of primer and 2 coats of paint.

The finished floor (or a slice that doesn't have a rug or furniture on it!). Now, doesn't it make you want to run and get a chocolate candy bar?
What I learned and now pass on to you:
1) Take your time when *taping off* (top, bottom, seams in between sheets of plastic/canvas/whatever you’re using). When you spray, the fine mist will get in to places paint wouldn’t if you were brushing it on. You don’t want to remove the plastic and discover you painted half the wall by accident (boo!).
2) Make sure if you’re going much darker that you tint your primer per manufacturers instructions. It’ll cut down your painting time, and save money on paint.
3) Make sure your primer is tinted properly! They didn’t actually tell me they couldn’t tint it, I figured out when I looked at the paint “blot” they put on the lid, which didn’t look tinted at all – it was barely off-white. Since it didn’t look right, I asked questions and found out about the lack of space in the can, etc., that I mentioned in the *side note*. When I tinted it at home using the rest of the tint, it was waaaaay darker than what they tried to send me out the door with. If something doesn’t seem right, don’t be afraid to ask questions!
4) If you’re going to do large sections of floor, invest in a sprayer. You’ll thank me later (after you’ve forgotten all about the overtime you had to work to pay for it lol).
5) Shellac based anything requires lots of ventilation! Remember to work safe.
6) If you think it can be done, it probably can. Often products made for one application can be easily adapted for use in another (blush as eye shadow, anyone?). Do your research and find a way!
7) Most importantly ~ Don’t be afraid! Kick off your stilettos, grab an old t-shirt and get to work… YOU CAN DO IT!
Until next time…
xx and oo’s


